CONCRETE DIAMOND IDEA DIY – 2 IN 1
[I]Today I would like to introduce to you a damn nice and brilliant DIY. Since my concrete tree project – which came really with you – I am in the fever. In the concrete fever! One can create the nicest and most modern things with this building material. Also as gift ideas many are suited very well. So also the today’s one. Because I clarify dear not only to introduce practical projects, but also, today I show you an especially cool concrete Do It Yourself idea. The today’s concrete diamond idea DIY is immediately 2 things in one! One can use this nice piece as a jewellery filing – for example, for arm maturity – as well as for plants.[/I][I]Topically there is in the Interior area in general the trend towards simple objects, or pieces of furniture of concrete. Our today’s concrete diamond lies more than in the trend! By his geometrical form he brings a certain charm in the space. Also by the unusual material this concrete is a diamond a real eye-cacher and proves that concrete is able just more, than to form only streets. Combined with a trendy golden clay there originates an elegant Deko the element which is able to do still what![/I]
[I] Especially well I like the concrete diamond as a plant holder. Just with extremely looking tillandsias he looks absolutely noble! These plants should have discovered loyal readers already a few times with me on the blog. Thus I have shown you with the project DIY Low budget designer shelve already a few photos. However, now let us with the today’s idea DIY get cracking![/I]

Required products for concrete diamond:
– Cement
– Quartz sand
– Water
– Bucket
– Spatula
– Old packaging from cardboard or Plastik
– Triangle ruler
– Pen
– Scissors
– Gold colored lacquer
– Tape
– Empty loo roll
– Tinfoil
– Steel chain & pliers

Thus the concrete diamond idea DIY is made:

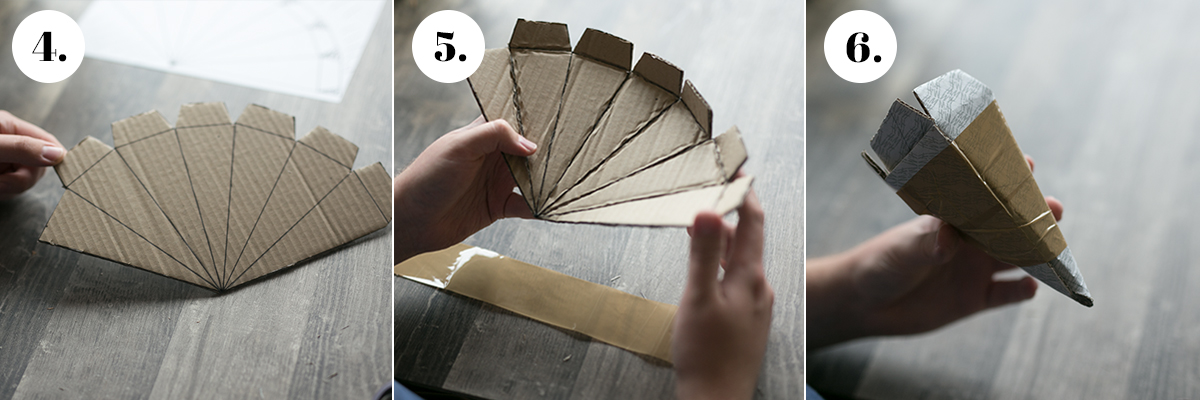
First we record to us the basic form for our later concrete diamond. On the photo you can see that the basic form reminds of a sort of fields. We cut out the hatched triangles later. It recommends to themselves to record the form first on a piece of paper and then to transfer afterwards on a piece of cardboard. If one likes the size and the form, we cut out our form with scissors.

If the basic form is cut out for our concrete diamond, we take the surfaces lying on top before and bend this easily. Also the lower part of our form is bent. We form a sort of ice-cream cone by the form. We stick this from the outside then with some adhesive tape, so that a stable diamond forms. One can attach to the safety on the point below still some adhesive tape, so that later no concrete leaks.

Thus our cardboard diamond looks if we have made everything right. Now this form is filled with concrete. In which ratio to us like her this anmischt, I have already shown you in the article concrete tree DIY. There you can read up in rest everything. If you have the concrete freshly angemischt, you fill this in the form. With possibly half you catch to you a loo roll and press this in the humid concrete. At the underside of the roll you fasten some Aulufolie, no concrete can penetrate at this point. Thereby we form a hollow cavity within our concrete diamonds.

As soon as the form to on top is full there, we smooth the surface and fasten on three corners a few small rings of a steel chain. We press this about 3-4 cm in the diamond full with concrete. Now we let our form dry about 26 hours. Then we can release our almost ready piece of art from the cardboard. When required the surface can be ground off yet something. Now one can fasten a few more other steel chain rings with tongs, so that one can also later hang up our diamond.

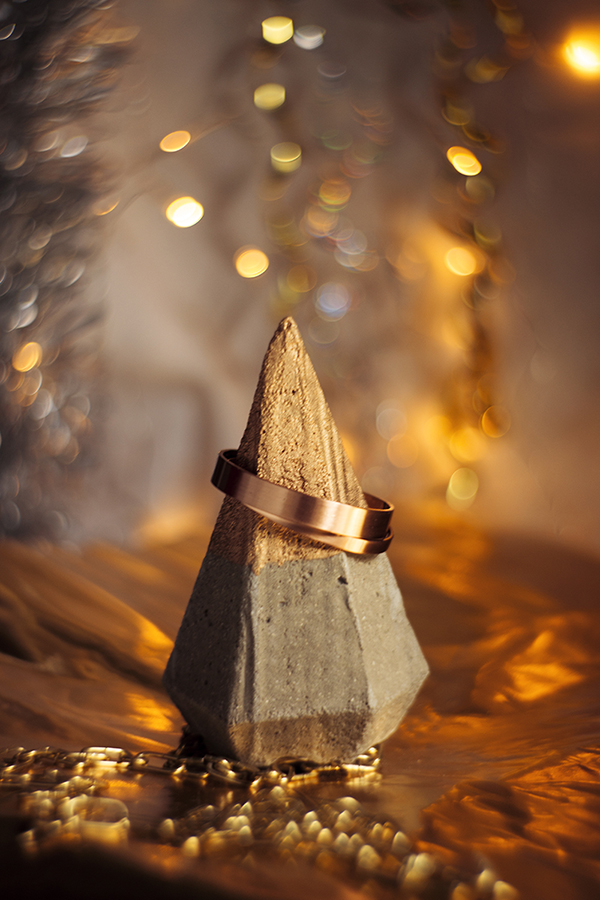
If we have extended the chain, we can varnish the lower piece of the diamond still gold. For this we simply stick on to us the area from and spray with some wallflower the point. If this has dried, we are ready! Now we can use our stylischen concrete diamonds immediately for two things: Equips with a tillandsia, we have a small breath of the hanging gardens of Babylon. Turned we can use our concrete to diamonds, however, also as a cool jewellery filing for all kinds of rings! By the created hollow cavity we can steal the chain simply quite fast. 😉


I find this concrete DIY idea simply amazing! As a plant hanger, as well as as a jewellery filing – I find the concrete diamonds miraculous! How do you like my today’s Do It Yourself project & would you copy it?


